I love hair bows and barrettes! I’m going to show you how to make a crochet bow hair clip, which is a great beginner project. The tutorial is based on a tutorial from Craftiness is Not Optional. You can make the bow in less than an hour.
Materials
- 4.0 mm crochet hook
- 1 ball of finger weight or sport weight yarn (class 1 or 2)
- Yarn needle
- Scissors
- Alligator clips (a pack is $3 at Michael’s)
- Super glue
This is an inexpensive project that costs less than $20.
Steps
Hold the crochet hook in your dominant hand. There are two ways to hold a crochet hook. Pick the method that is most comfortable for you.

I’m showing with my left hand to take pictures with my right hand.

I’m a rightie.
Wrap the yarn around the index finger of your other hand, and pinch the end of the yarn with your thumb and middle finger.

To make the slip knot for your crochet hook, wrap the yarn around the crochet hook by placing the hook on top of the yarn, going back, and coming around.

Pinch where the yarn crosses with your thumb and middle finger and twist it.

Yarn over and pull the yarn through the loop. Tighten.

You can adjust size of the loop by pulling it with your crochet hook. As you make your first chain stitch (ch), pinch the knot with your thumb and middle finger. To make a chain stitch, yarn over and pull the yarn through the loop. Make 14 more ch. As you ch, hold onto the previous ch. Try to keep the size your ch as constant as possible. Don’t make your chain stitches too tight or too loose. For more chain stitch practice, you can make this neckpiece made entirely from chain stitches.


One ch made!
Stick your crochet hook in the 2nd ch from it, under two loops. Yarn over and pull through. Now you have two loops on your hook.

This is the top of the chain.

This is the underside of the chain.
Yarn over and pull through both loops. You have made a single crochet stitch (sc)! Do this in all of the ch to the end. Try to keep the size of the stitches the same.

See that tail at the end? Estimate the length of the tail and the total number of ch that equal that length. Before you make the next sc, fold the tail over the ch and make your sc wrapping the tail inside. 

Keep making sc to the end. If you have a loop from the tail at the end, find the end of the tail inside your stitches and pull it. Cut the excess yarn.


Make a chain stitch. For sc, you make 1 ch at the end for your turning chain.

Skip the first sc and make a sc in the second stitch. That ch you made counts as the first sc in the row. Keep making sc to the end. You should have 14 stitches in total.

Fold the piece in half with the tail on the outside. Stick your hook where there’s a loop on the short end. Don’t put your hook through the sc. You need to connect the short ends together.
Yarn over, and pull the yarn through. This is a slip stitch (sl st). Sl st are often used to join pieces.
Make another sl st. If the short ends are not completely connected, that’s okay. We’ll hide it later on.


Cut the yarn, leaving 6 in., and pull the yarn through. Tighten it.

Turn the band inside out. Center the connecting seam, pinch the center, and wrap yarn around it.

When you have about 1 1/2 in. of yarn left, thread it in a yarn needle and stick the yarn under the wrapped yarn. Make a few stitches if you can. Cut off the excess yarn.

Put a dot of glue on the wrapped yarn section with the stitches. Place the alligator clip on top. Clamp the clip and the bow together to secure them as the glue dries.


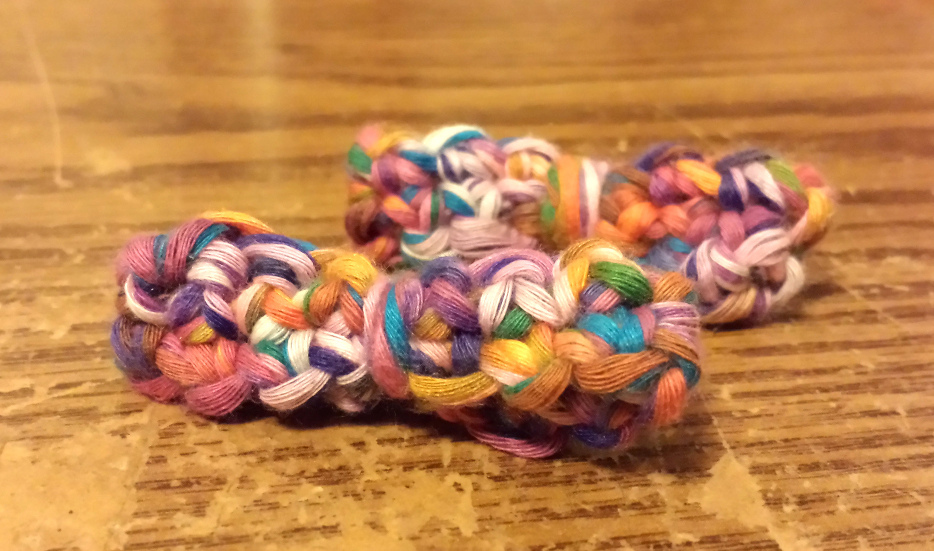
And we’re done!
You can adjust the amount of ch you start with and the amount of rows depending on the weight of your yarn, the size of your hook, and the size of your desired bows. If you’re making this for a bowtie wearer, you can put a safety pin instead of a clip.
This is a great gift for someone who loves bows. If you made something with this tutorial, I’d love to see it!
Crafting into the sunset,
Virginia